Showing posts with label Basic Grey. Show all posts

Thursday, April 4, 2013

CFC97 - Thankful for you

Hello, and happy Friday!  I hope everybody had a lovely Easter.  We went over to some friends' house and had such a great time, eating yummy food, dying eggs, hunting eggs, eating more yummy food...it was a lot of fun!  Today I'm here with this week's challenge from CAS-ual Fridays!
CFC97: Use both chevrons and flowers in your clean and simple project.

And this week's challenge is sponsored by the oh-so-fabulous Ellen Hutson!  The winner will receive a $25 gift certificate to spend here.

I love both of the design elements required for this week's card, so it was super easy to create this paper yummy:

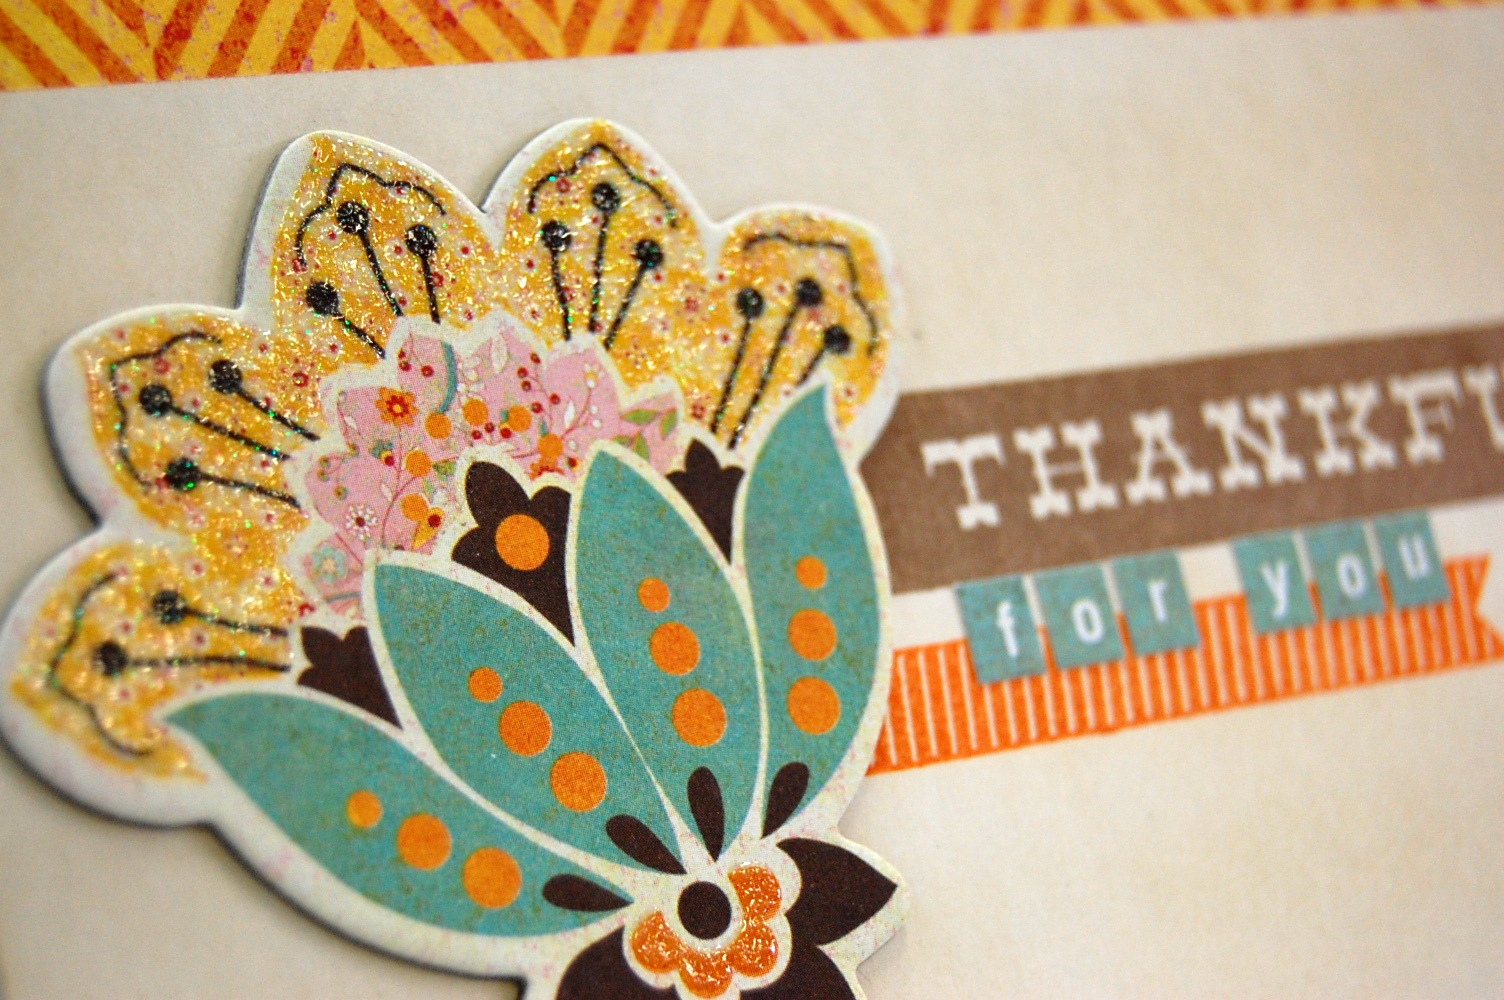
This card came together really quickly, which doesn't happen too often 'round here.  I used a shaped card base by Basic Grey (which already had that cool chevron pattern on it!), and paired it with a big chipboard flower and alpha stickers also by Basic Grey.  The two banner stamps are from this stamp set by Kelly Purkey and Simon Says Stamp.  I stamped them on a piece of plain white cardstock, then distressed it to better match the chipboard piece.  Here's a close-up:

I really hope you'll play along with this challenge!  You have until next Thursday at noon EST to do so.  Thanks so much for looking!

Supplies: card base, chipboard flower, alphabet stickers: Basic Grey; card stock: Georgia Pacific; stamps: Kelly Purkey/Simon Says Stamp; inks: Tsukineko (brown), TPC Studios (orange), Ranger (Tim Holtz Distress Ink in Antique Linen)

Thursday, March 21, 2013

CFC95 - Happy day

Happy Friday!  It's so crazy to me to think that it's already March 22.  Wow, time flies!  I'm here today with a new challenge from CAS-ual Fridays, and it's a doozy:
CFC95: You may use stickers, die cuts, pattern paper...but NO STAMPS in your clean and simple project

And the sponsor for this week's challenge is the fabulous SRM Stickers.  The winner of this week's challenge will win an awesome prize package, full of all sorts of sticker goodies!
                                                              
For this week's card, I used an SRM sticker along with some die cuts and patterned paper to create this paper yummy:
The bird and speech bubble are a die cut, as well as the clear plastic banner with the orange border.  Both are from Basic Grey.  The banner worked perfectly with a sticker strip from SRM, because both are clear and they fit together so nicely!  I adhered the sentiment sticker onto the paper die cut, then used Glossy Accents to adhere the plastic die-cut banner over the top.  I added some white dashed lines around the bottom edge of the die cut, then layered it onto some cute chevron patterned paper by My Mind's Eye.  Easy peasy!  Here's a close-up:
I hope you'll resist the urge to use stamps, and play along with this week's challenge!  You have until next Thursday at noon EST to do so.  Thanks so much for looking!

Supplies: card stock: Stampin' Up!; patterned paper: My Mind's Eye; die cuts: Basic Grey; sticker: SRM Stickers; corner rounder punch: Marvy Uchida; white gel pen: Uniball

Friday, March 15, 2013

CFC94 - Happy birthday!

Hello, and happy Friday!  I'm so so sorry that this post is just now going live.  It appears as though Blogger ate my original post (HATE it when that happens!!), and I'm at work today so I haven't been able to re-create this post until now.  Oh well...whaddya gonna do?!?  On to the fun stuff...how about a fun new challenge from CAS-ual Fridays?
 CFC94: Use chipboard in your clean and simple project

And the sponsor for this week's challenge is CAS-ual Fridays Stamps!  The winner of this challenge will receive a $20 gift certificate to spend here.  YAY!

So for this week's challenge, I wanted to use some giant glittery chipboard letters that I've had for years, and find somewhat difficult to use simply due to their size.  But they worked perfectly for this paper yummy:

The base of this card is actually a  frosted report cover from an office supply store.  I love that it's frosted, so it's somewhat similar to a clear acetate card, without the glossy finish and potential for fingerprints.  Yet, it's transparent enough that the stamped "happy birthday" sentiment shows through the card even though the yellow card stock is adhered to the inside of the front of the card.  Cool, right?!?  Here's a closer look at the stamped sentiment:

Above the large glittery chipboard letters, I applied some star cardstock stickers, then applied some Stickles to bring in some more glitter.  Here's another view:

I really hope you'll play along with this week's challenge!  You have until next Thursday at noon EST to do so.  Thanks so much for looking!

Supplies: report cover: GBC; card stock: Core'dinations (yellow), Georgia Pacific (white); chipboard letters: Making Memories; card stock stickers: Basic Grey (stars); stamps: CAS-ual Fridays Stamps (WTF stamp set); ink: Tsukineko; punches: Fiskars (scalloped edge), We R Memory Keepers (corner rounder); glitter glue: Stickles by Ranger

Friday, January 11, 2013

Paper Smooches Sneak Peeks

Happy Friday!  For this week's CAS-ual Fridays post, click here or scroll down.

If you're here for a Paper Smooches sneak peek, you've found the right place!  Thanks so much for hopping over!  I am over the moon excited that Kim invited me to help sneak peek her new product release!!!  Here are the deets:

Paper Smooches is showing off their CHA release during the entire month of January.  37 designers are participating along with the PS DT, so there will be a ton for projects to inspire you this month.  Paper Smooches is known for their fun and whimsical hand-drawn stamps.  They decided that it was time to broaden their product line to include DIES and wood mount stamps!  

I have a project to share using NEW PS product that releases on February 1, 2013 at www.papersmoochesstamps.com along with many retail stores around the globe.
You will find a new blog link (or two) to follow every day in January at the PS Blog. 
Paper Smooches is giving away $500 worth of product!  Hidden on FIVE of the participating blogs is a prize package worth $100 each. The prize includes a variety of stamp sets, wood mounts and dies.  Comment on as many blogs as you can to increase your chances to be one of the five winners.
Deadline is January 30th – winners will be announced on the PS Blog on January 31st.
The product I'm giving you a sneaky peek of is one of Kim's new dies, Prickly Bloom.  I've used it to create these paper yummies:

The large flower shape is the Prickly Bloom die.  I cut it from some fun polka-dot paper, then added some stamped stitching from the Santa Paws stamp set. For the stem, I used the clothesline from the Pip Squeaks set (which is also where the little heart is from), and the leaves are from Daisies & Paisleys.  The sentiment is from Flap Happy.  I stitched around the edges of a Ranger kraft tag, then added the stamping and die cut.  Here are some other views:


I also made a second card using the Prickly Bloom die:

On this card, I wanted to use the die cut as a stand-alone focal point, without the stem and leaves.  Again, I die-cut it from some patterned paper, but then used Copic markers to add some shading.  Then I scored each "petal" from the tip to the center and folded them upward.  I stamped and fussy-cut a butterfly from the Flap Happy stamp set for the center of the Prickly Bloom.  I created the sentiment using the We Connect set, and stamped it in white ink.  I also created the stamped scalloped edge using a solid circle stamp from Hullabaloo.  Here are some other views of this sweet card:


Thanks SO MUCH for looking!  I am honored to be a part of this sneak peek blog hop.  Have a great day!


Card 1
Supplies: card base: Recollections; patterned papers: Basic Grey; tag: Ranger; stamps, die: Paper Smooches; ink: Tsukineko (Memento Tuxedo Black); sewing machine: Kenmore; quilting thread: Americana; seam binding: Hug Snug; baker's twine: Divine Twine

Card 2
Supplies: card base, rhinestones: The Paper Studio; card stock: The Paper Studio (kraft), Georgia Pacific (white); patterned papers: Basic Grey; stamps, die: Paper Smooches; ink: Joann Craft Essentials (white), TPC Studio (blue); markers: Copic; seam binding: Hug Snug  

Thursday, August 30, 2012

CFC68 - Scootin' off to school

Happy Friday, everybody!  Today I'm heading up to Phoenix to go to Hobby Lobby (for the second time this week - didn't realize I needed something the first time. Duh!) and I'm going to hit up a stamp store while I'm up there, since there are no LSS/stamp stores here in Tucson.  Lame-o.  Anyway, I'm looking forward to it.  Ya know what else I'm looking forward to?  This week's CAS-ual Fridays challenge!  YAY! There are some really exciting things in the works over at the CAS-ual Fridays blog.  The first thing (and the only thing we can disclose so far) is a new Girl Friday!  Yep, the very talented Piali Biswas is joining us, starting with this week's challenge!  And here it is:
CFC68: Create a Clean and Simple back to school project

The sponsor for this week's challenge is Pretty Paper Studio.  The winner of this week's challenge will receive a gift certificate to spend in their super cute store!

Ok, so onto the challenge! I love so many of the back-to-school-themed paper collections, but they tend to be geared toward younger children.  I wanted to go a slightly different route with my card, and make one for a "kid" going off to college.  With that in mind, I created this paper yummy:

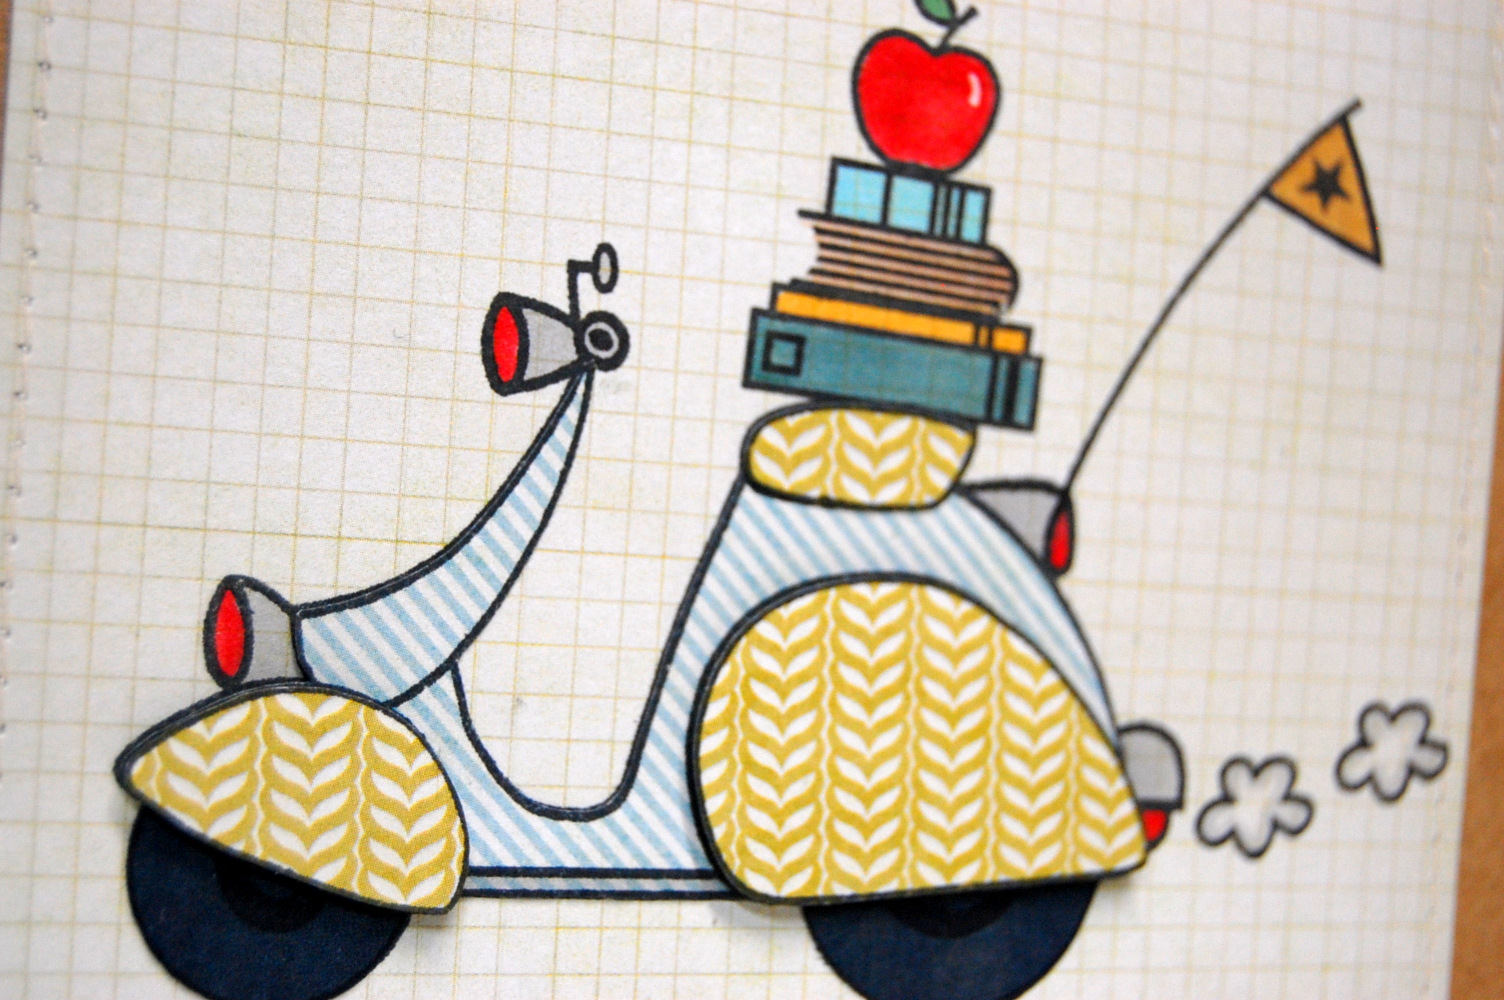
I was looking for a way to incorporate the scooter from the Paper Smooches Spiffy Scooters set, and when I saw the stack of books from the Smarty Pants set, it just "clicked."  I stamped the scooter onto the graph patterned paper, colored in the lights, then stamped the stack of books onto the seat.  I stamped the apple on top of the books, then stamped the puffs of smoke and the flag coming out the back of the scooter.

I created the sentiment using the Paper Smooches Alphadot set, and stitched around the edge of the graph patterned paper:

I paper pieced the scooter, and popped the "fenders" up on dimensional tape:

Here is another view:

Are you at the top of the class?  We'd love to see your back to school project, and you have until next Thursday at noon EST to play along with this week's challenge.  And don't forget to stay tuned for the big changes coming to CAS-ual Fridays in the near future! Thanks so much for looking!

Supplies: card base: The Paper Studio; patterned papers: My Mind's Eye, Basic Grey; stamps: Paper Smooches; ink: Tsukineko; markers: Copic; corner rounder: We R Memory Keepers; sewing machine: Kenmore; thread: Americana
Thursday, June 14, 2012

CFC57: Be you

Happy Friday to all! I'm back with another fun challenge from CAS-ual Fridays!  This week it's clear as day:
Create a CAS project using acetate or vellum

That's right - the challenge is to use acetate or vellum on your project.  And the sponsor for this week is stamp designer and Girl Friday Karolyn Loncon.  Yep, our very own Karolyn designed 6 stamp sets for Paper Smooches, and the winner will receive ALL 6 SETS!!!  Her sets are some of my faves - they are wonderfully graphic and they build upon each other so nicely.

Okay, on to the challenge.  I always love the look of acetate and vellum, but for some reason they're not really my go-to's.  I should use them more.  I had so much fun creating my card for this challenge.  And here is my paper yummy:


I used a bunch of transparencies from Basic Grey, and used a punch from Stampin' Up! to create windows for the transparencies:

Since my punch wouldn't quite reach to the very middle of the black cardstock, I punched it as far in as it could go from either end, and that left me the perfect space to stamp a sentiment:

I created the "be you" using the Alphadot stamp set from Paper Smooches, and heat embossed it with mustard yellow embossing powder.  I finished off the card with a yellow star transparency backed with white cardstock, a green cardstock star sticker, and a red brad:

I really love the way it turned out.  I love all the little phrases on the transparencies, and I adore the patterns on them!  How about you?  Do you use acetate or vellum often?  We would LOVE to have you play along with this week's challenge, and you have until next Thursday at noon EST to do so.  Thanks so much for looking!  Don't forget to stop by and give all the other Girl Fridays some bloggy love!

Supplies: cardstock: Georgia Pacific (white), Recollections (black); transparencies, cardstock sticker: Basic Grey; word window punch: Stampin' Up!; stamps: Paper Smooches; ink: Versamark; embossing powder: American Crafts; brad: craft supply; corner rounder punch: We R Memory Keepers