Thursday, January 10, 2013

CFC85 - Awesome (you did it!)

Happy Friday to all!  I hope everybody had a great week.  Today I'm going riking with a friend of mine.  Don't know what that is?  Oh, that's probably because it's a word I made up.  It's hiking, but we run when we can.  Last time we went, we did a 14.5 mile trail.  Today, we were going to do a 21.5 miler, but a cold snap is coming through (which is supposed to be the longest one we've had since 1971!!), so we've decided to do a 7.5 miler instead.  Hope we don't freeze to death!!! Anyway, today I'm also bringing you this week's challenge from CAS-ual Fridays! Woo hoo!
CFC85: Round of applause
Create a clean and simple card that celebrates an accomplishment and features at least one circle

And the sponsor for this week's challenge is CAS-ual Fridays Stamps!  The winner of this challenge will receive a $20 store credit!  And guess what else?  There is a new release coming out on January 18th! Check out the stamp blog for sneak peeks January 14-17!

So, on this card, I gave you a little pre-sneak peek of a new stamp set that's coming out.  Can you spot the new stamp on this paper yummy?:


I used some Spellbinders Nestabilities dies on this card (the circle and the star).  I stamped the sentiment onto the circle, then embossed that cool dotted chevron border (Cuttlebug "Charles") above it.  I adhered the circle to the front of the card.  I temporarily adhered the star in place to use as a guide.  Then, using the same "you did it!" stamp that I used on the circle (from the Woot Woot set), I stamped repeatedly around the circle by curving the stamp on my acrylic block to match the curve of the circle.

To create the star, I cut a bunch of 1/8" strips of white cardstock.  I wanted to make sure the rainbow colors on the star matched the inks I was going to be using in the sentiment, so I colored each strip of cardstock using a direct ink-to-paper approach.  Then I place my star die on a separate piece of cardstock and traced around it.  I covered the area inside the tracing with double-sided adhesive, then adhered the colored strips diagonally until the traced outline of the star was completely covered.  Then I die cut that area using the same star die.  I applied some diamond Stickles around the edges of the star, and adhered it using dimensional adhesive.  Here's another view of the sentiment, embossing, and glittery rainbow star:

I hope you'll play along with this week's challenge!  You have until next Thursday at noon EST to do so.  Thanks so much for looking!

Supplies: card stock: Copic X-Press Blending card stock; stamps: CAS-ual Fridays Stamps; inks: Tsukineko (black), TPC Studios (all colors); embossing folder: Cuttlebug by Provocraft "Charles" border; dies: Nestabilities by Spellbinder; die cutting machine: Sizzix; glitter glue: Stickles by Ranger; corner rounder: We R Memory Keepers Corner Chomper

Thursday, January 3, 2013

CFC84 - Thanks

Hello, and happy Friday!  I'm back with this week's CAS-ual Fridays challenge, and I think you'll really find this to be quite a timely challenge: 

Yep, the challenge is to create a thank you card.  Perfect, right?  With Christmas just behind us, who doesn't need a thank you card (or 10?)?  And the wonderful sponsor for this week's challenge is Ellen Hutson
Not only will the winner receive gift certificate to spend in the store, she'll also win a guest designer spot at the CAS-ual Fridays blog!  YAY!  And now for the paper yummies:

For this card, I wanted to paper-piece the butterfly and have a layer whose wings I could pop up.  So I stamped the butterfly image 3 times: once on the background (where the blue and gray papers meet), and twice on the yellow patterned paper. I fussy-cut the two yellow patterned butterflies, then adhered one of them flat onto the background.  With the second yellow butterfly, I placed adhesive only on the "body", not the wings.  I adhered the body of the second on top of the first, then folded the wings upward.

I lightly penciled in a "trail", then machine-stitched over the top with yellow thread:

I added some bling to the butterfly body, and along the trail down to the sentiment:

I really enjoyed making this card!  I hope you'll find the time to play along with this week's challenge.  You have until next Thursday at noon EST to do so!  Thanks so much for looking!

I'm also playing along here:
Paper Smooches SPARKS challenge - Anything Goes


Supplies: card base: The Paper Studio; patterned papers: My Mind's Eye; stamps: Paper Smooches (Flap Happy, Simply Said); ink: Tsukineko (Memento London Fog); rhinestones: The Paper Studio; sewing machine: Kenmore; quilting thread: Americana

Saturday, December 29, 2012

CAS-ual Fridays Stamps - Happy New Year

Happy Saturday!  I hope everybody's Christmas was as awesome as mine!  My family traveled to Oklahoma to spend Christmas and New Year's with my brother, his wife, and their ADORABLE baby.  She is just too stinkin' cute!!!  I just wished they lived closer so I could see her more than just at Christmas.  But we did have a white Christmas, and even more snow yesterday, so this Arizona girl is having a great time!  We'll be here through New Year's Day.  And speaking of the new year, I have a card to share with you using the CAS-ual Fridays Stamps Countdown set. Michele featured this card on the CAS-ual Fridays Stamps blog today. Now for the paper yummies:

I decided to make a shaped card using the Labels Collection Framelits Dies from Stampin' Up!.  I used one of the larger dies to create the card, then used a smaller die to create a mask and apply the pink ink.  Then I stamped the border from the Countdown set across the middle of the card.  After that, I used my embossing buddy across the front of the card, then stamped and embossed the sentiment.  I used Copic markers to color in parts of the border stamp, then added some embroidery floss.  Another single-layer card!  What's gotten into me lately?

Well, I wish everyone the happiest of new years!  Thanks so much for looking!

Supplies: card stock: Stampin' Up!; stamps: CAS-ual Fridays Stamps; inks: Close To My Heart (Hollyhock), Tsukineko (black, embossing ink); embossing powder: American Crafts; dies: Stampin' Up!/Sizzix; embroidery floss: DMC 

Thursday, December 20, 2012

CFC83 - Let it snow

Happy Thursday!  I'm here today with an extra special CAS-ual Fridays challenge.  Yep, on a THURSDAY!  Okay, here's the challenge:

Sounds festive, right?  Well, here's what makes it really special!  We're teaming up with the 10 Minute Craft Dash challenge, AND you get an extra week to play along:


So the challenge is to create a holiday card in 10 minutes or less.  Don't worry, you can gather all your supplies before you start your timer! Okay, now for the paper yummies:

I decided to single-layer with this one, peeps!  Which, as you know, is really not my cup of tea, but I'm trying!!  I also went with some non-traditional holiday colors, as the three ink pads were stacked on my shelf and I thought they looked pretty cool together (they are Close To My Heart inks in the colors Desert Sand, Hollyhock, and Smokey Plum)!  To create the large rings, I used the back side of a circular sentiment stamp from the Merry Kiss-mas set.  I stamped off each ring one time onto some scrap paper to lighten the color up a little bit.  Then I stamped a large snowflake from Snowflake Greetings in the center of each ring (again, I stamped off the snowflake over which I was going to be stamping my sentiment, to lighten it up).  Then I stamped the sentiment, lining up the small snowflake from the word "snow" with the larger snowflake in the background.  I added pink rhinestones to the centers of the Hollyhock snowflakes, and a purple rhinestone to the center of the Smokey Plum snowflake.  To finish off the card, I rounded two opposite corners.  BAM!  There you go.  Single-layer and under ten minutes (9:06 to be exact)!

I hope you'll be dashing through the holidays with us.  And don't forget, you have TWO weeks to play along with this challenge!  WAHOO!!!  CAS-ual Fridays Stamps is sponsoring this challenge, and the winner will receive $20 to spend in the store!


Thanks for looking!

Supplies: card stock: Stampin' Up!; stamps: CAS-ual Fridays Stamps; inks: Close To My Heart; rhinestones: Me and My Big Ideas; corner rounder: We R Memory Keepers

Friday, December 14, 2012

8 Happy Nights - Night 6

If you've been following along at the CAS-ual Fridays Stamps blog, you've had a chance to see all the wonderful Hanukkah cards the other Girl Fridays have made.  Well tonight it's my turn to share a card made with the 8 Happy Nights stamp set!  Now for the paper yummies:

I started off by cutting my stamp (I know...EEK!  Even though I know it's okay, it still causes just a little bit of angst when I first start cutting a stamp apart!).  Since I was going to be stamping the 8 repeatedly, it just made more sense to cut the 8 away from the adjoining words than to mask the words every single time.  I used a white pigment ink to stamp the 8s on my kraft card base.  By a happy accident, I ended up with just enough room at the bottom of my card to fit the perfect sentiment (rather than a sentiment banner going across the 8s, as was my original plan).  I randomly stamped some blue Stars of David right on top of the white 8s, then added some Diamond Stickles to the stars.  I finished off the card with a seam binding bow.  If you don't mind the repeated stamping, this card would be super easy to reproduce, as it's basically a single layer card (plus ribbon).  And, the recipient of this card said it was the prettiest Hanukkah card she's ever received.  YAY!  Here's a close-up of the sentiment and glitter:

I hope all of you who celebrate Hanukkah are indeed having 8 happy nights!  If you haven't seen all the other creations, check them out here.  You can see the entire stamp set below, and you can buy it here:


Thanks for looking!

Supplies: card stock: Recollections; stamps: CAS-ual Fridays Stamps; inks: Joann (white), TPC Studio (blue); glitter glue: Ranger; seam binding: Hug Snug; corner rounder: We R Memory Keepers

Thursday, December 13, 2012

CFC82 - Sorry!

Happy Friday to all!  I'm back with this week's CAS-ual Fridays challenge:
CFC82: Use creative scoring on your clean and simple project

And the sponsor for this challenge is none other than Scor-Pal!  The winner of this week's challenge will receive her very own Scor-Buddy!  Yayness!

I love the look of decorative/creative scoring on cards, I just wish I could remember to use it more often!  For this challenge, I racked my brain trying to think of clever ways to incorporate scoring, but nothing was clicking.  Then I decided to put to paper a card idea I've been mulling over in my head, and it hit me!  And now for the paper yummy:

So, this card was inspired by the little game piece stamp from the Paper Smooches Knick Knacks set.  It looks just like the game piece from the board game "Sorry!".  So I stamped it in each of the four colors from the game, then created the word "Sorry!" using the Alphadot stamp set.  Then I used my Scor-Pal to create a grid pattern around the edges of the card, to simulate a game board.  I added some Glossy Accents to the game pieces to finish off the card:

How will you even the score?  You have until next Thursday at noon EST to play along with this week's challenge, and I hope you do!  Thanks for looking!

Supplies: card stock: Stampin' Up! (white), Recollections (black); stamps: Paper Smooches; inks: TPC Studio (red, blue, yellow, green), Tsukineko (black); Glossy Accents: Ranger; scoring board: Scor-Pal

Thursday, December 6, 2012

CFC81 - Believe

Happy Friday!  I hope everybody has had a wonderful week.  I'm here today with the super-fun CAS-ual Fridays challenge for this week!  Here it is:

CFC81: Knotty or nice
Incorporate knots into your clean and simple project

And since it's the first challenge of the month, that means we're sponsored by the fabulous Simon Says Stamp!  But not only will the winner of this challenge receive a gift certificate to spend in their store, she will also be a future guest designer at the CAS-ual Fridays challenge blog!


So, onto the challenge.  I really had a hard time deciding how I wanted to incorporate knots onto my card.  I kept thinking about the knots in a wood grain pattern, but wasn't sure if that would count.  So I decided I would learn how to make French knots to use on this paper yummy:

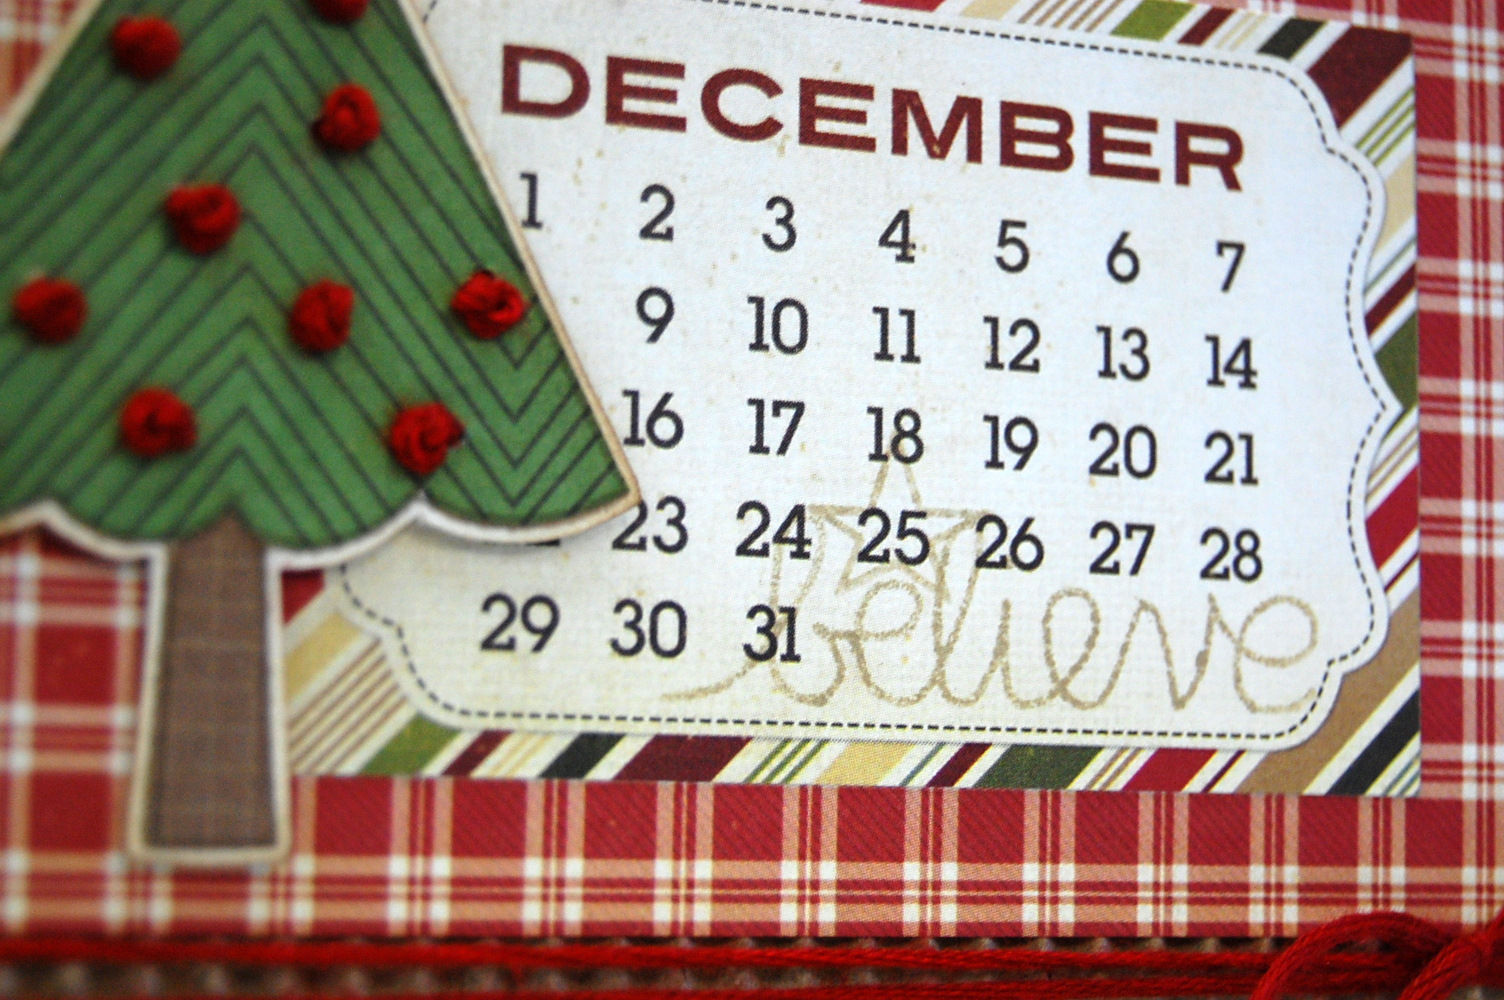
I used this tutorial, which was great and super easy to follow.  I used the All Yule Need stamp set from Paper Smooches to stamp and paper-piece the tree and star.  I made the French knot "ornaments" using red embroidery floss.  I cut the December calendar from the Simple Stories Handmade Holiday 6x6 pad, and stamped the "believe" from the Paper Smooches Christmas Sampler set under the numbers.  I stamped a star over the 25.  Here's a close-up of the knots and calendar:

We'd love to have you play along with this week's challenge!  You have until next Thursday at noon EST to get knotty with us.  Thanks for looking!

Supplies: corrugated card base: Recollections; patterned papers: Simple Stories (red plaid, calendar), Lawn Fawn (green chevron for tree, yellow for star), Echo Park (tree trunk); stamps: Paper Smooches; ink: Ranger (Tim Holtz Distressing Ink in Frayed Burlap); embroidery floss: DMC